Prerequisites
Before diving into the GhostFile Host File Manager, ensure you have the following prerequisites in place:
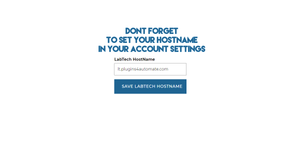
- ConnectWise Automate (formerly LabTech): Ensure your installation of ConnectWise Automate is up-to-date. This will ensure compatibility with the GhostFile plugin.
- Administrator Access: You will need admin privileges to install and configure the plugin effectively.
- Network Access: Verify that your network policies allow for the installation of new plugins and that you have the necessary permissions to modify host files across the systems you manage.
Step 1: Installation
Installing GhostFile Host File Manager is a straightforward process. Follow these steps to get started:
- Download the Plugin: Visit the GhostFile Host File Manager product page and download the plugin file.
- Access Plugin Manager: Open your ConnectWise Automate Control Center, and navigate to the Plugin Manager.
- Install the Plugin: Click on 'Add Plugin', then browse to select the downloaded GhostFile plugin file and install it.
- Restart Automate: Once installed, it's a good practice to restart your Automate server to ensure the plugin is fully integrated.
Step 2: Configuration
Now that GhostFile is installed, let's configure it:
- Access the Plugin: In ConnectWise Automate, locate the GhostFile Host File Manager from your plugins list.
- Initial Setup: Open the plugin interface and familiarize yourself with the layout. You'll see options to manage HOST, LMHost, Network, Services, and Protocol files.
- Set Permissions: Establish user permissions as needed, ensuring that only authorized personnel can make changes to host files.
- Client Console Configuration: Configure the client console to manage one, many, or all systems under a client from a single interface.
Step 3: First Run
With everything set up, it's time to run GhostFile for the first time:
- Test with a Single Entry: Choose a system to modify a host file entry. Add, update, or delete an entry to verify the plugin's functionality.
- Verify Changes: After making changes, the plugin will automatically flush the DNS resolver cache on the system to apply changes immediately. Confirm that the changes are reflected.
- Check Logs: Review the plugin's log files to ensure no errors occurred during the process.
What's Next
Now that you have the basics down, consider exploring some advanced features:
- Batch Management: Use the client console to manage host files across multiple systems simultaneously, saving time and reducing repetitive tasks.
- Automated Scripting: Set up scripts to automate frequent host file changes, enhancing your service efficiency.
- Explore Additional File Types: GhostFile isn't limited to host files; manage LMHost, Network, Services, and Protocol files with the same ease.
Need Help?
If you encounter any issues or need further assistance, don't hesitate to visit our support forums. Our community and support team are ready to help you make the most of GhostFile Host File Manager.