Prerequisites
Before diving into the world of streamlined Office 365 management with our plugin, ensure you have a few essentials in place. First, you need to have ConnectWise Automate (formerly LabTech) installed and operational. Our plugin supports Automate versions 12, 11, 10.5, and 10. It's crucial to check that your environment is up-to-date to avoid compatibility issues.
Additionally, ensure you have the necessary permissions for managing Microsoft Online Services (MSOL) within your clients' environments. This includes administrative access to Office 365, Exchange, and SharePoint services.
Finally, a stable internet connection is vital for seamless communication between Automate and Microsoft's cloud services. With these elements in place, you're ready to enhance your RMM capabilities.
Step 1: Installation
The installation of the Office 365 for LabTech plugin is straightforward. Begin by visiting our product page and purchasing the monthly subscription. At $29.95 per month, you gain unlimited client and user account management.
Once you've subscribed, download the plugin from your account. In Automate, navigate to the plugin manager and select 'Import Plugin'. Locate the downloaded file and initiate the upload. Automate will handle the rest, integrating the plugin into your environment.
Step 2: Configuration
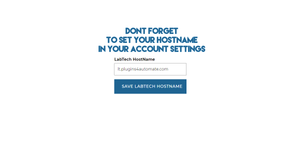
After installation, it's time for initial configuration. Open the plugin from within Automate's interface. You'll need to input your Office 365 administrative credentials to link Automate with your MSOL services.
Configure global settings to define how the plugin interacts with Microsoft's services. Ensure that the correct permissions are set for managing Exchange, SharePoint, and Azure services across all client accounts. This step is crucial for maintaining security and efficiency.
Step 3: First Run
With configuration complete, it's time to verify the plugin's functionality. Start by accessing the 'Office 365 Management' panel within Automate. Here, you should see a comprehensive list of all client accounts you're managing.
Perform a quick check by selecting a client and reviewing their Office 365 service statuses. Look for any discrepancies or alerts that may require attention. The plugin should provide a single pane of glass view into each client's MSOL environment, highlighting the power and convenience of integrated management.
What's Next
Now that you're up and running, consider exploring the advanced features of the Office 365 for LabTech plugin. Dive into automated reporting to keep clients informed about their cloud service usage and health. Leverage PowerShell scripting capabilities to automate repetitive tasks and enhance efficiency.
Another feature to explore is the ability to set up automated alerts for service disruptions or anomalies within client environments. This proactive approach ensures you're always a step ahead in maintaining client satisfaction.
Need Help?
If you run into any roadblocks or require further assistance, don't hesitate to visit our support forums. Our community and support team are ready to help you maximize the benefits of your Office 365 management plugin. Learn more and get started today!